
 Welcome to the One Stylish Party Studio! I am excited to give you a glimpse inside my workspace in today’s post. While I have always been a home-based blogger and creative business owner, I only recently created a designated studio within my home.
For many years, I would work out of a common bonus room space, which allowed me to multi-task when my children would be home with me and playing nearby. Now with both kids in school and a greater need for storage and organization for my growing business, I felt like it was the perfect time to create an official One Stylish Party studio.

My goal was to create a space that would spark creativity and allow me to streamline my business processes, organize inventory, stock current product and efficiently prepare orders for shipment.
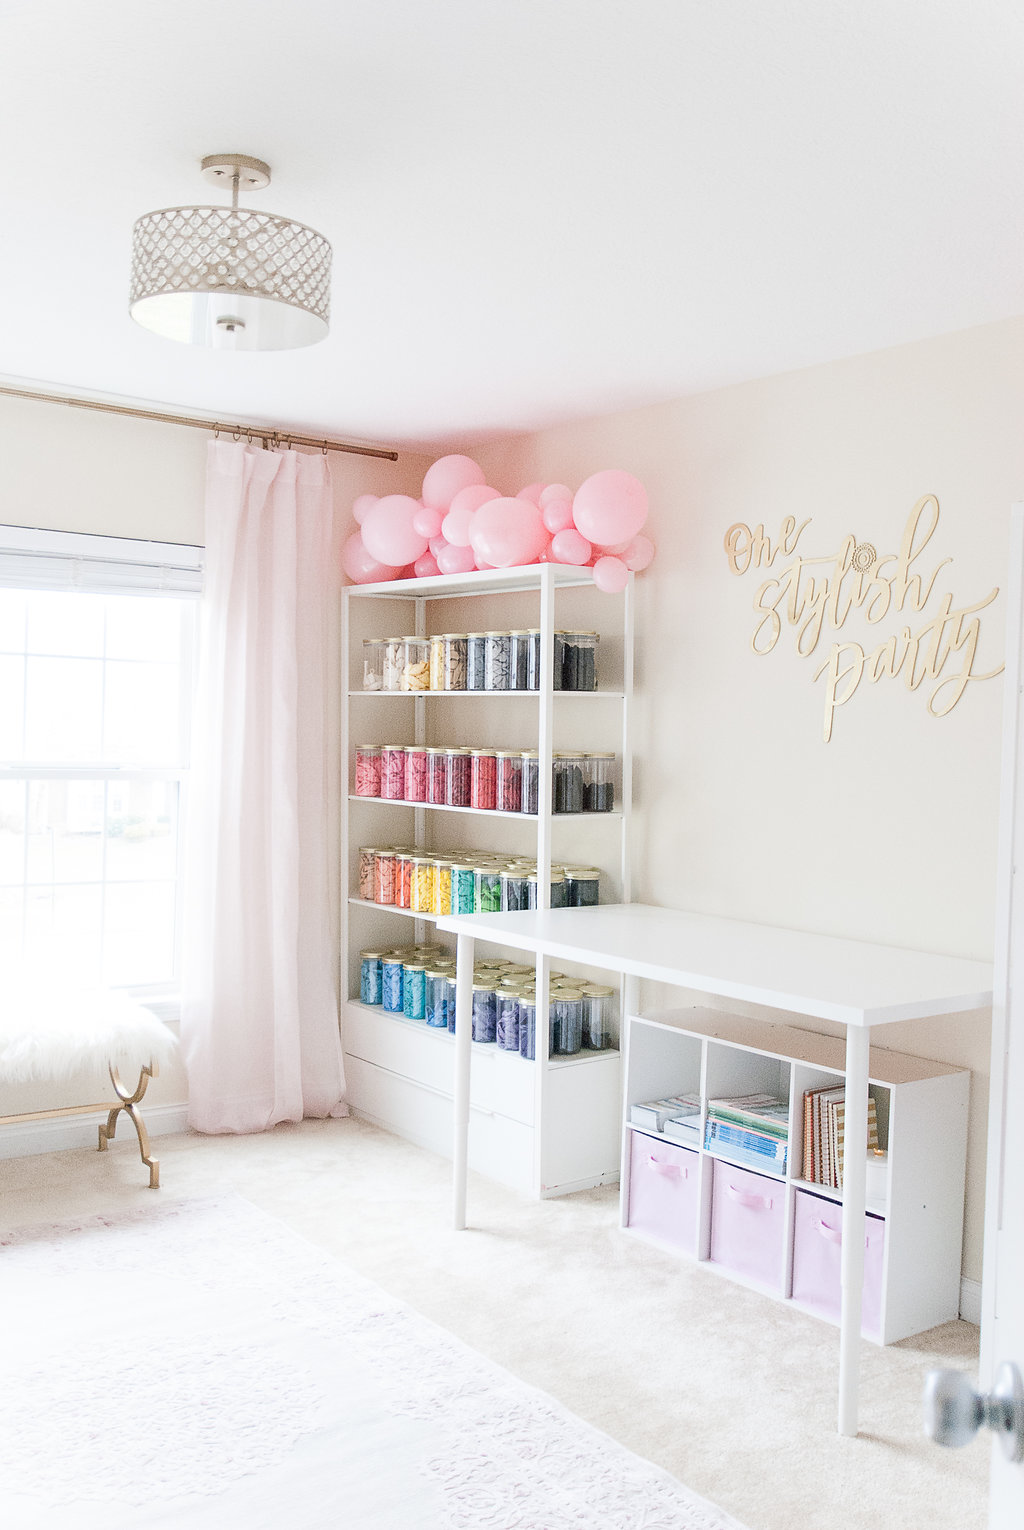
Before buying a single item for my studio, I started by creating a layout for the space to ensure all of my needs would be met. The main components I knew I needed were a desk for my computer, a shipping station, a table for product assembly and lots and lots of shelves for inventory and storage.
The large furniture items were sourced primarily from Target and Ikea, which allowed me to keep costs low, while creating functionality and also maintaining my vision for the space. Once the main furniture pieces were in place, I was able to move on to styling my studio with pretty little details to make it feel like my own. As a wife and mom who lives with three boys, it was so much fun decorating with ultra-feminine accessories that would typically never be found in my home.
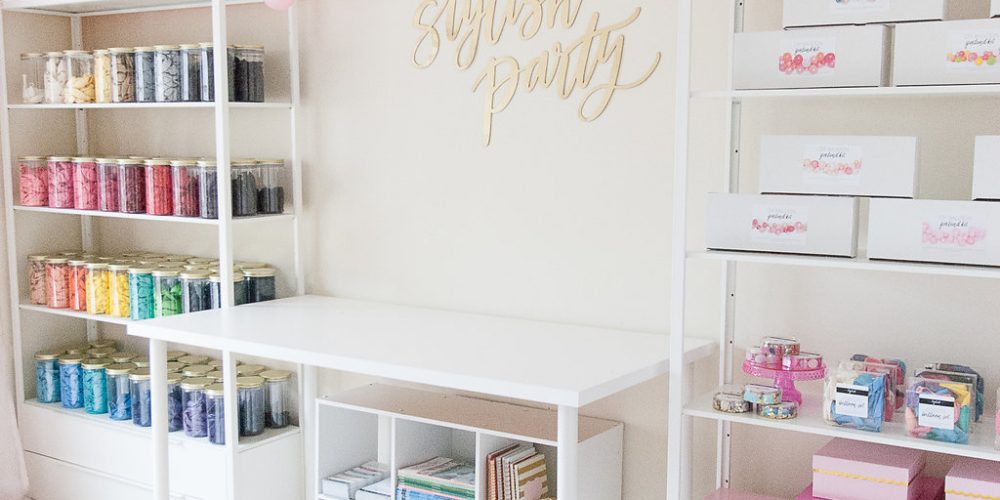
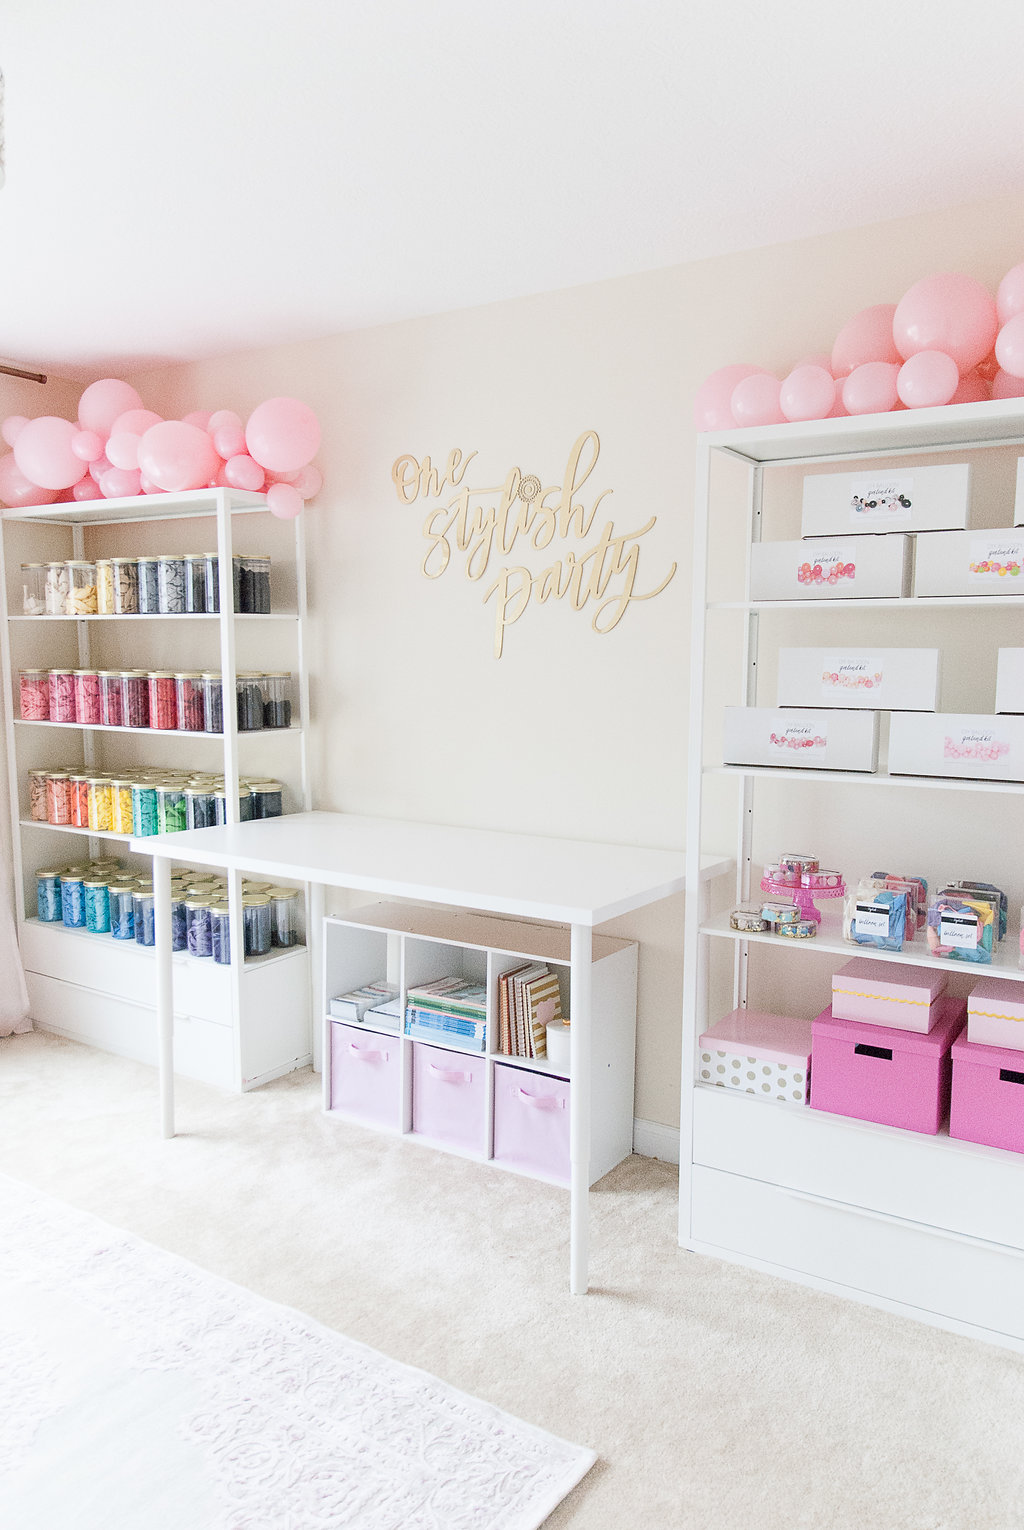
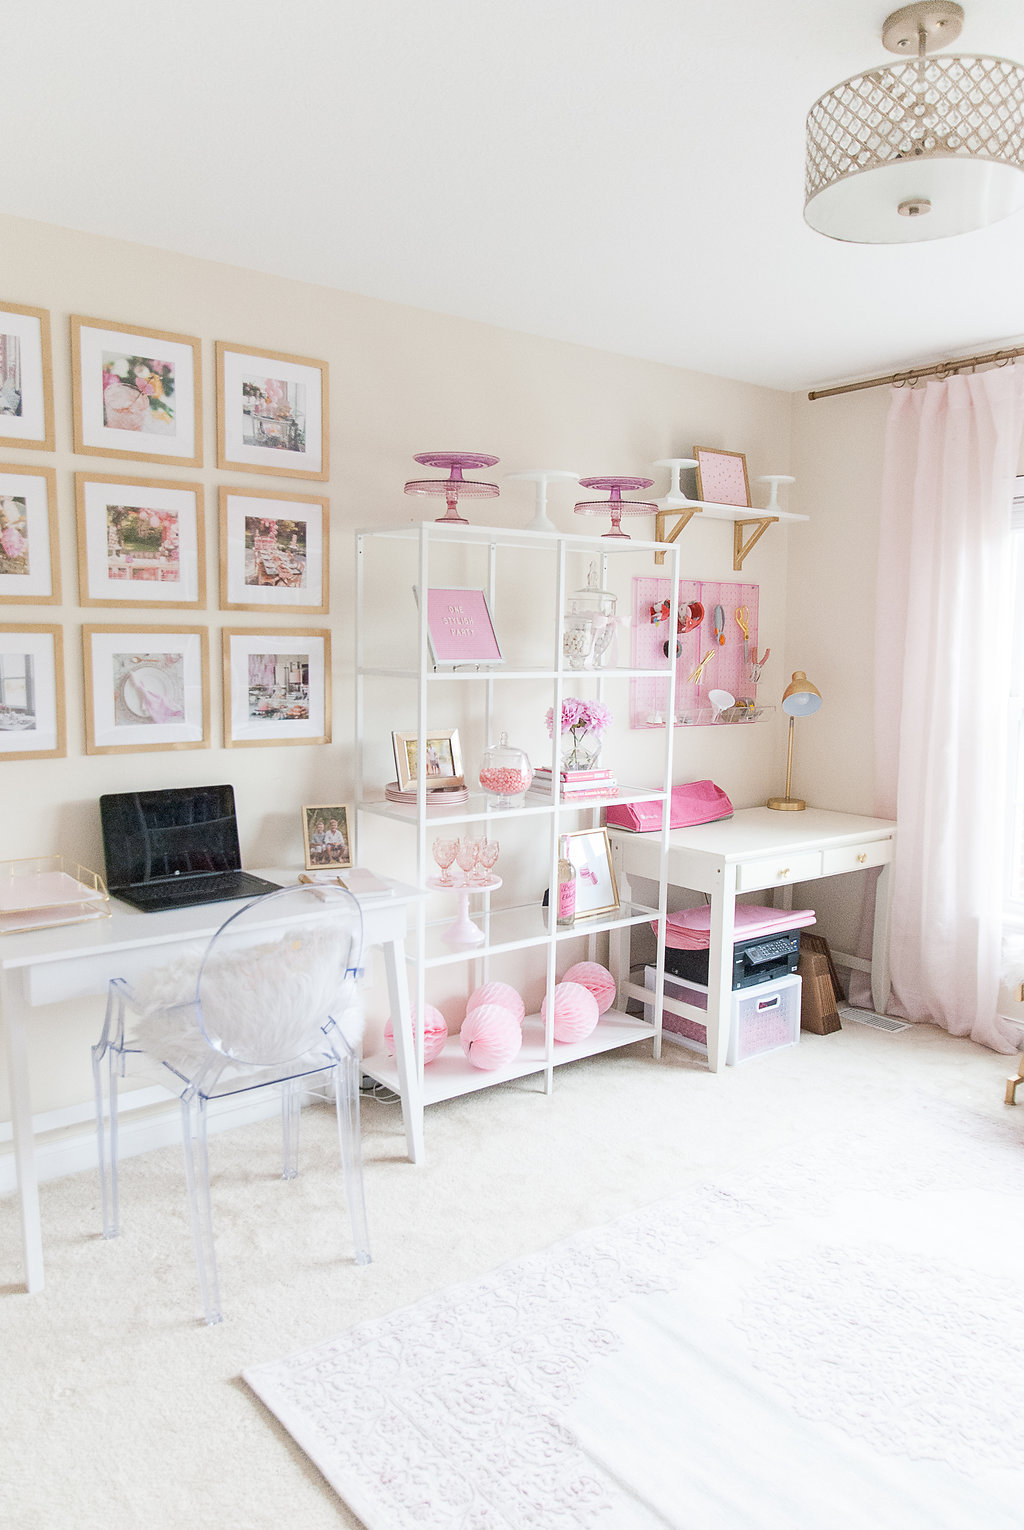
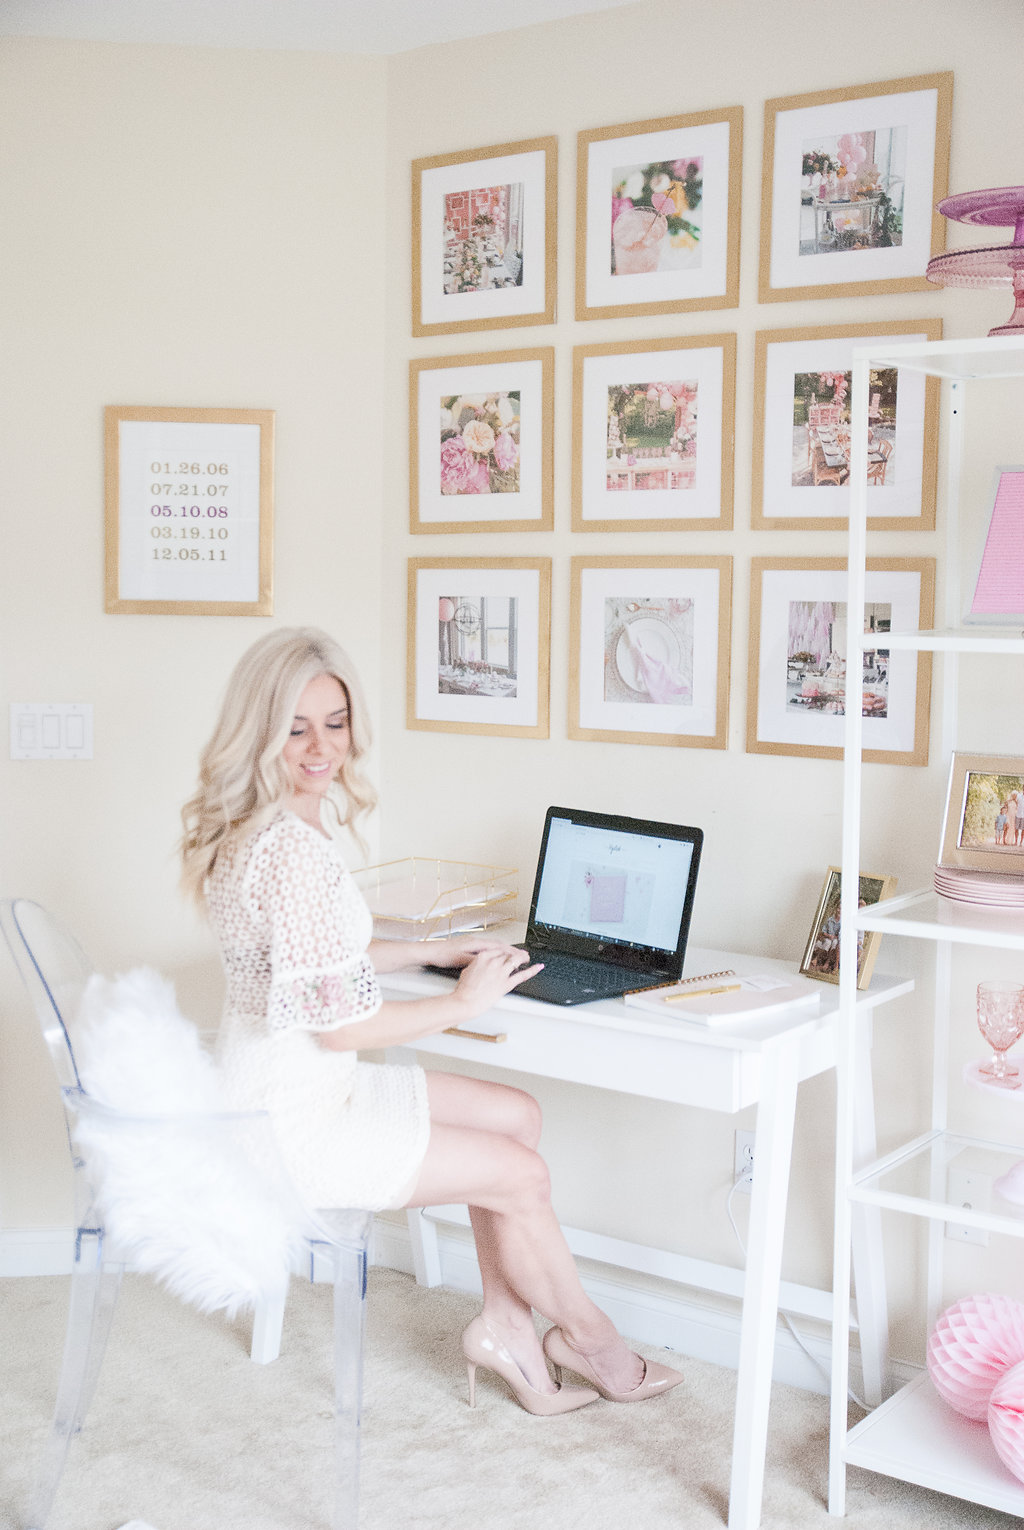
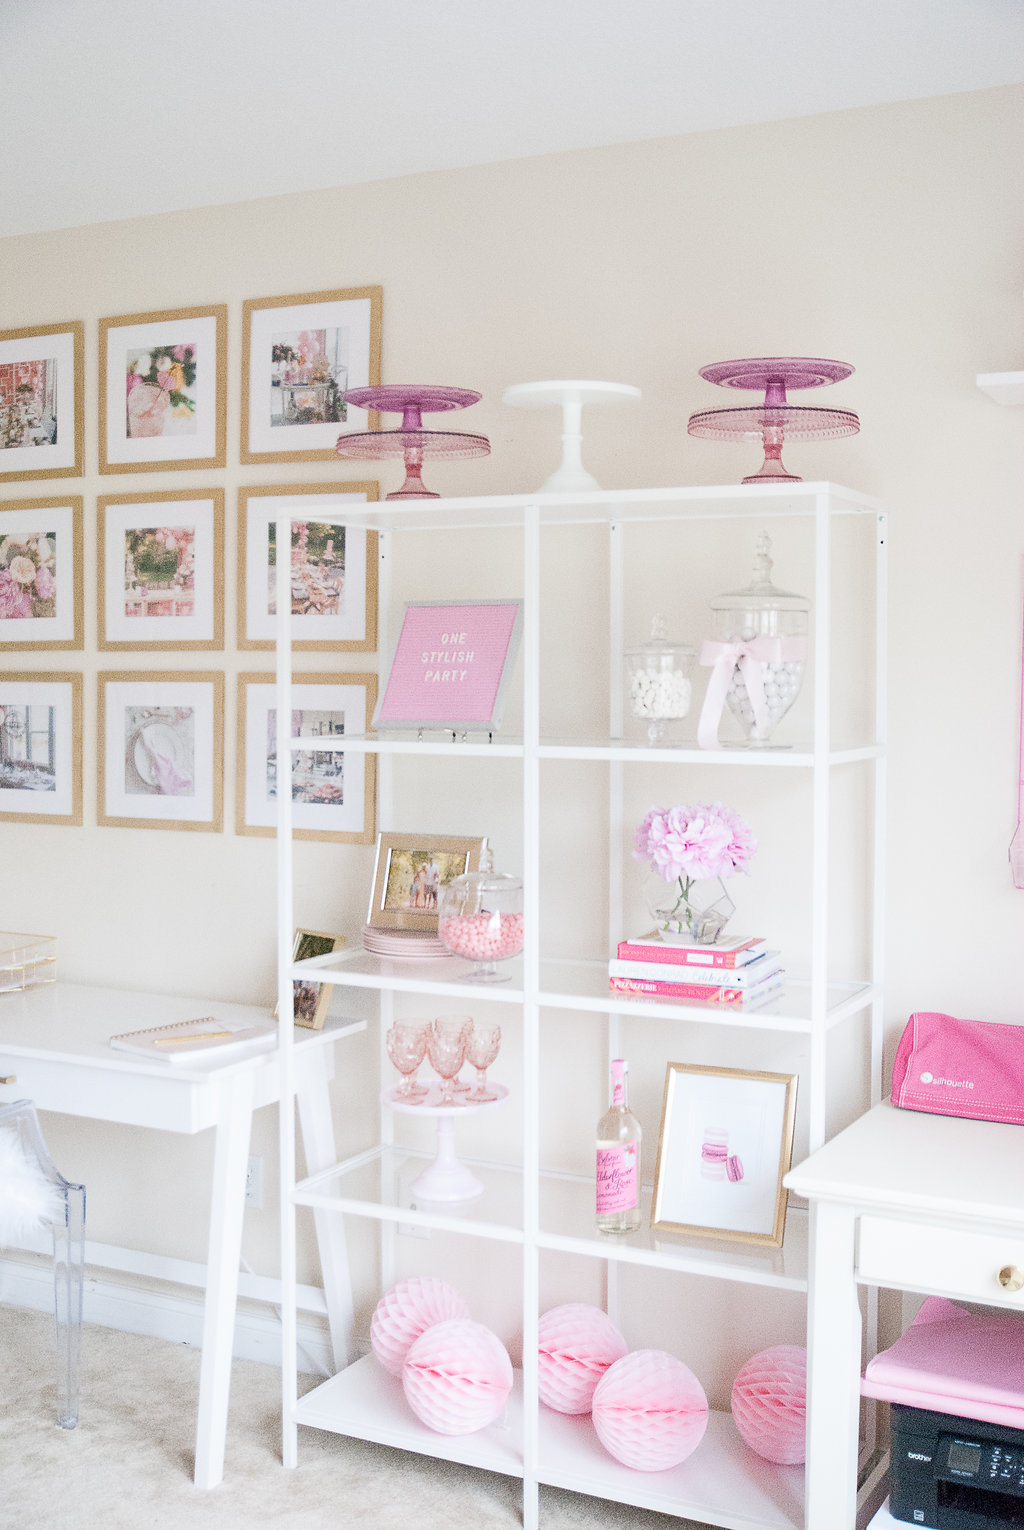
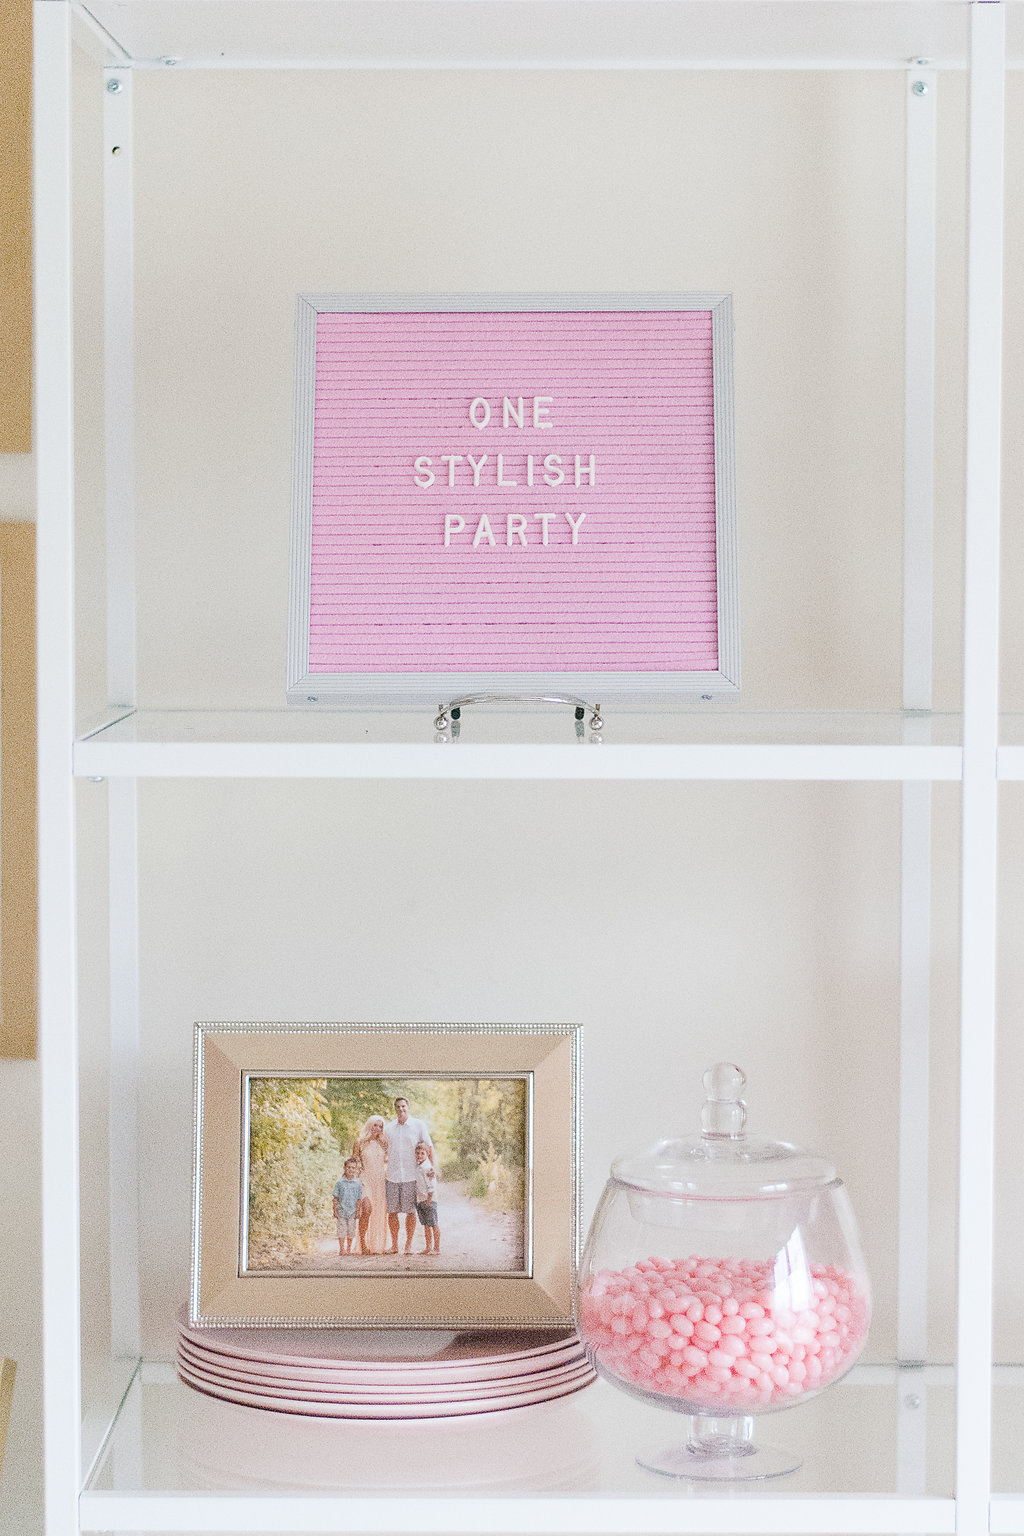
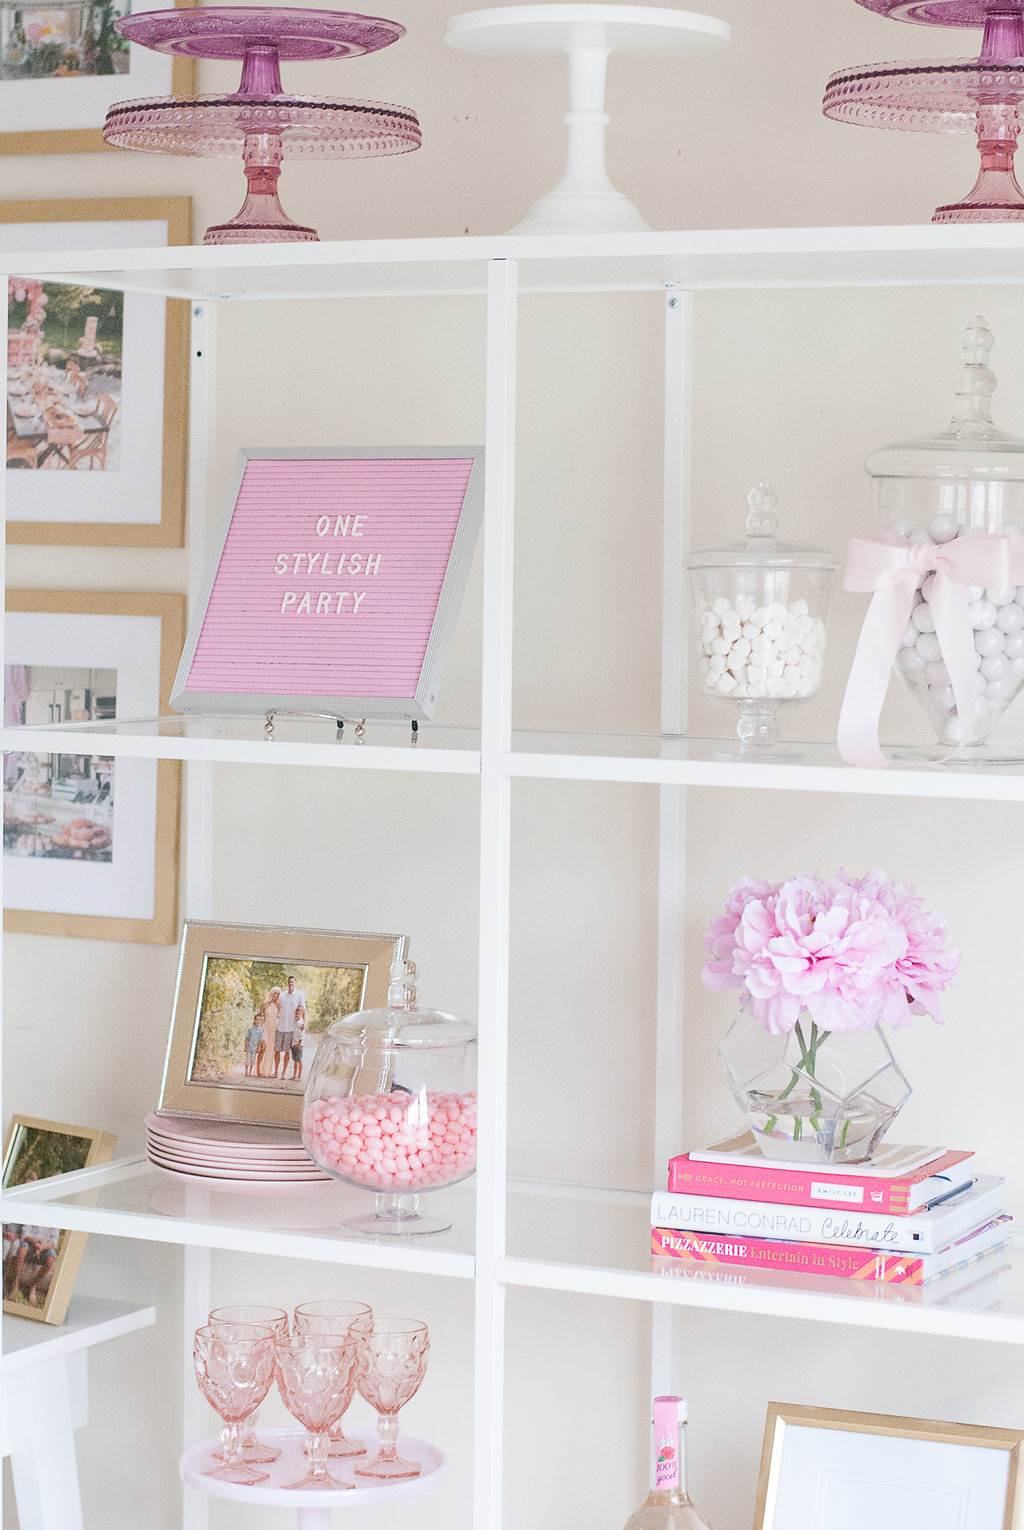
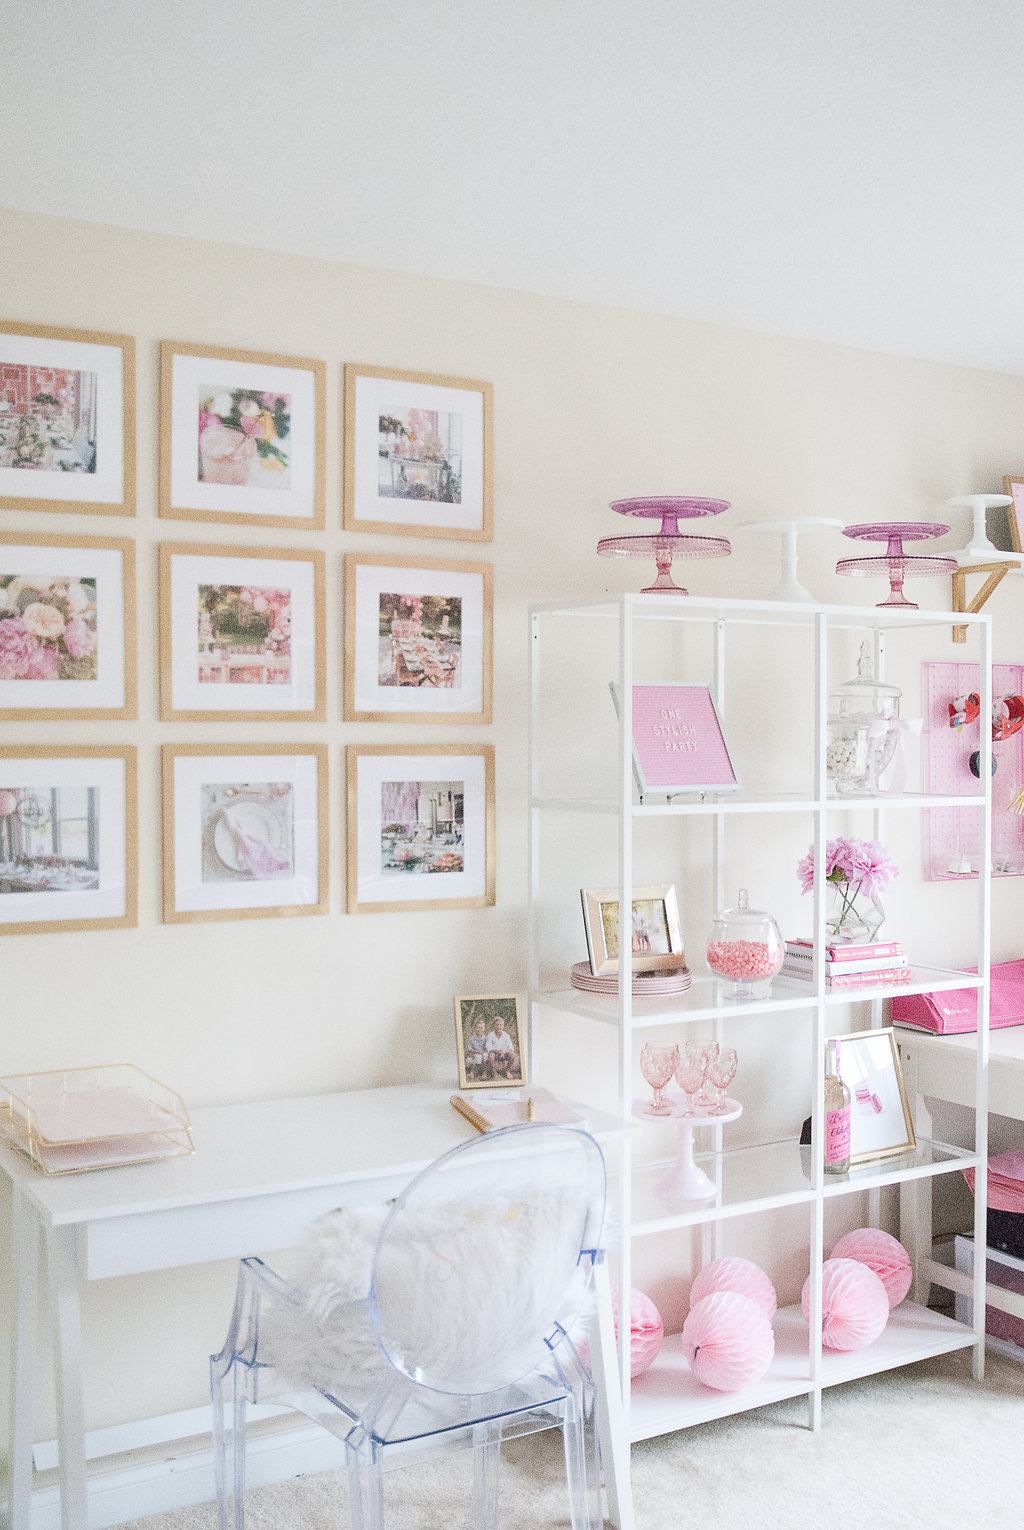
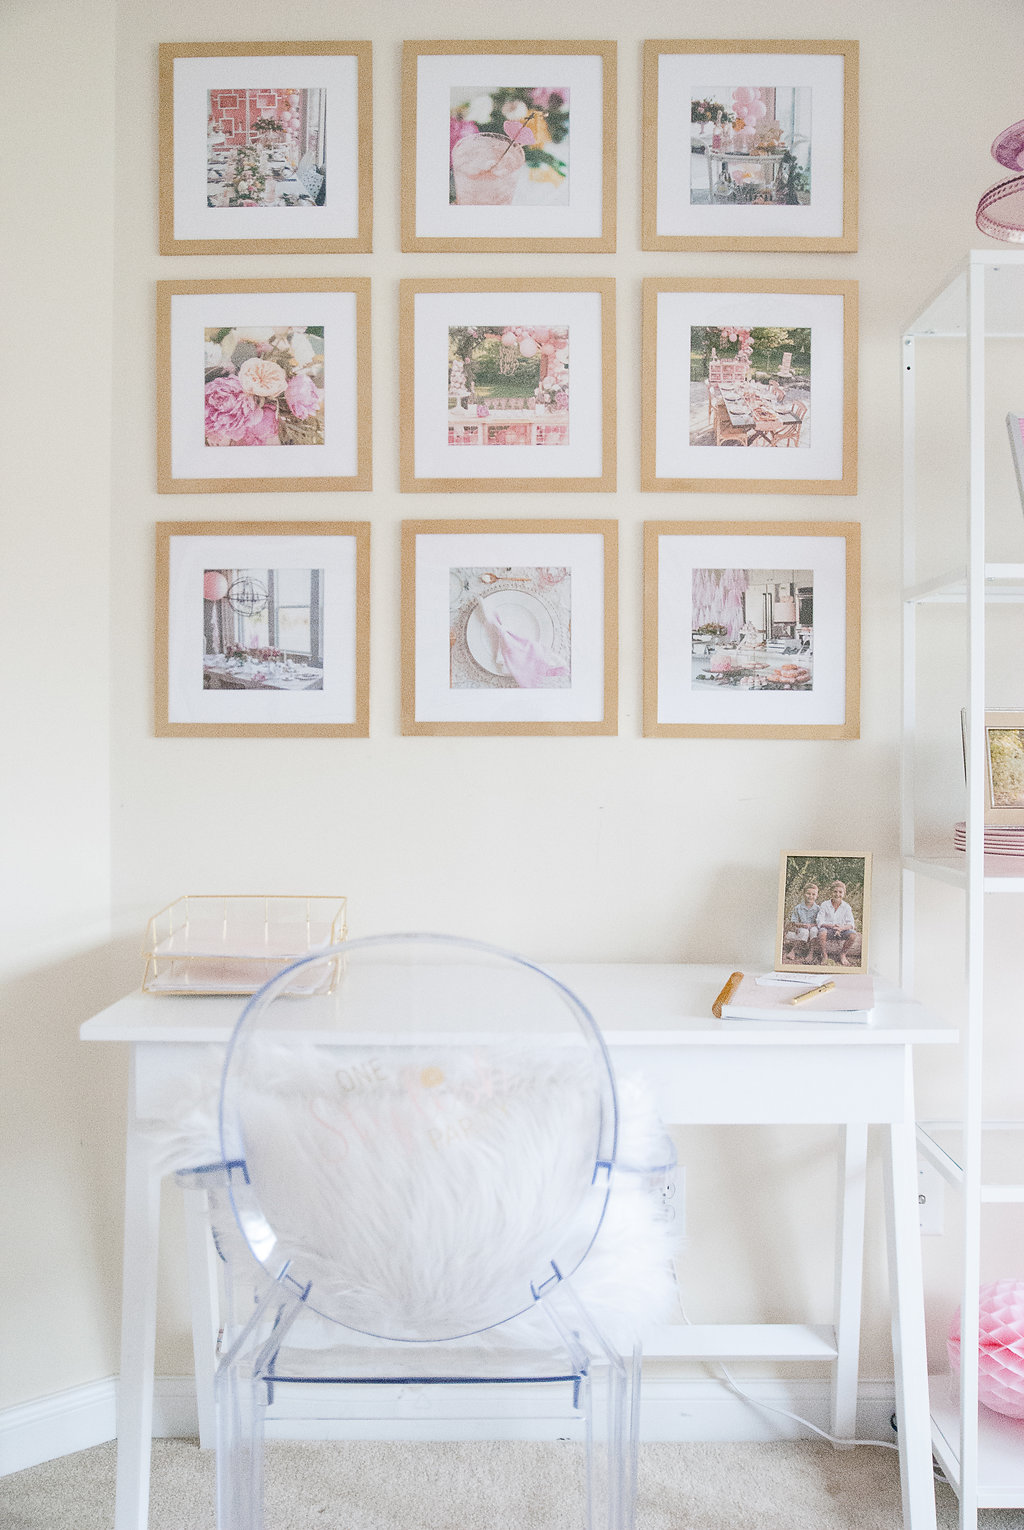
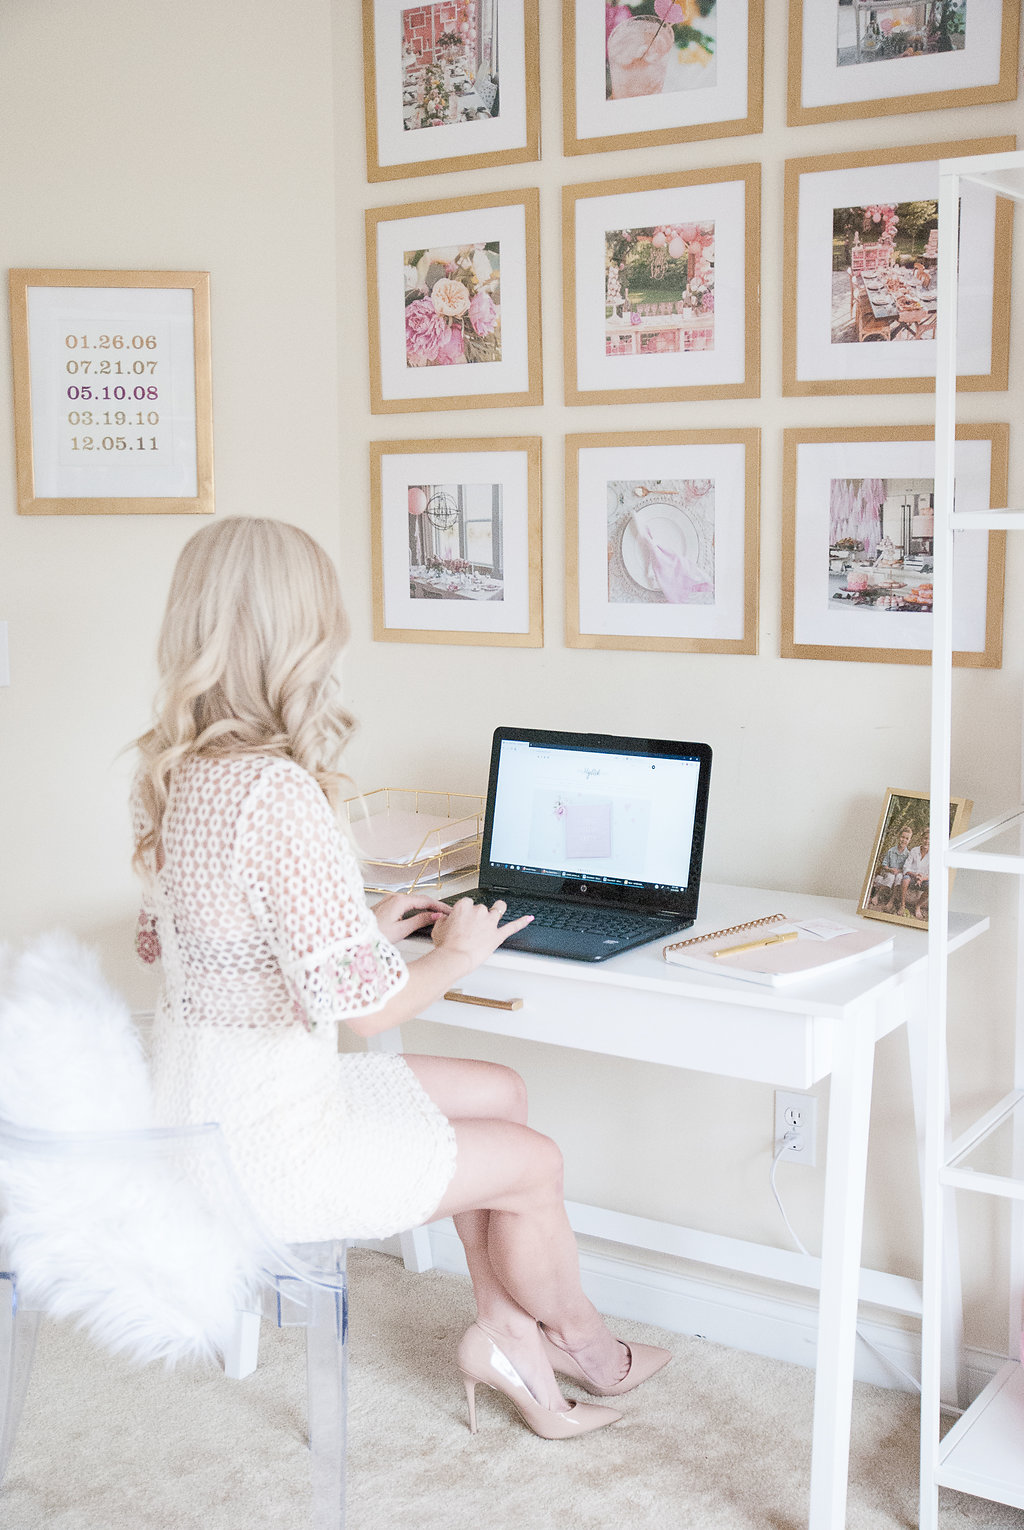
Seaworthi literally made my branding dreams come true with the large laser cut logo that hangs above my work table. I also love how the DIY gallery wall feature came together above my computer desk. I transformed inexpensive 12″ x 12″ frames with metallic gold spray paint, and used them to display 8″ x 8″ photos from my past styled shoots. To keep it cohesive, I focused on including photos with pink as the primary color and alternated between tablescape, detail and floral shots to display in the frames from each shoot.
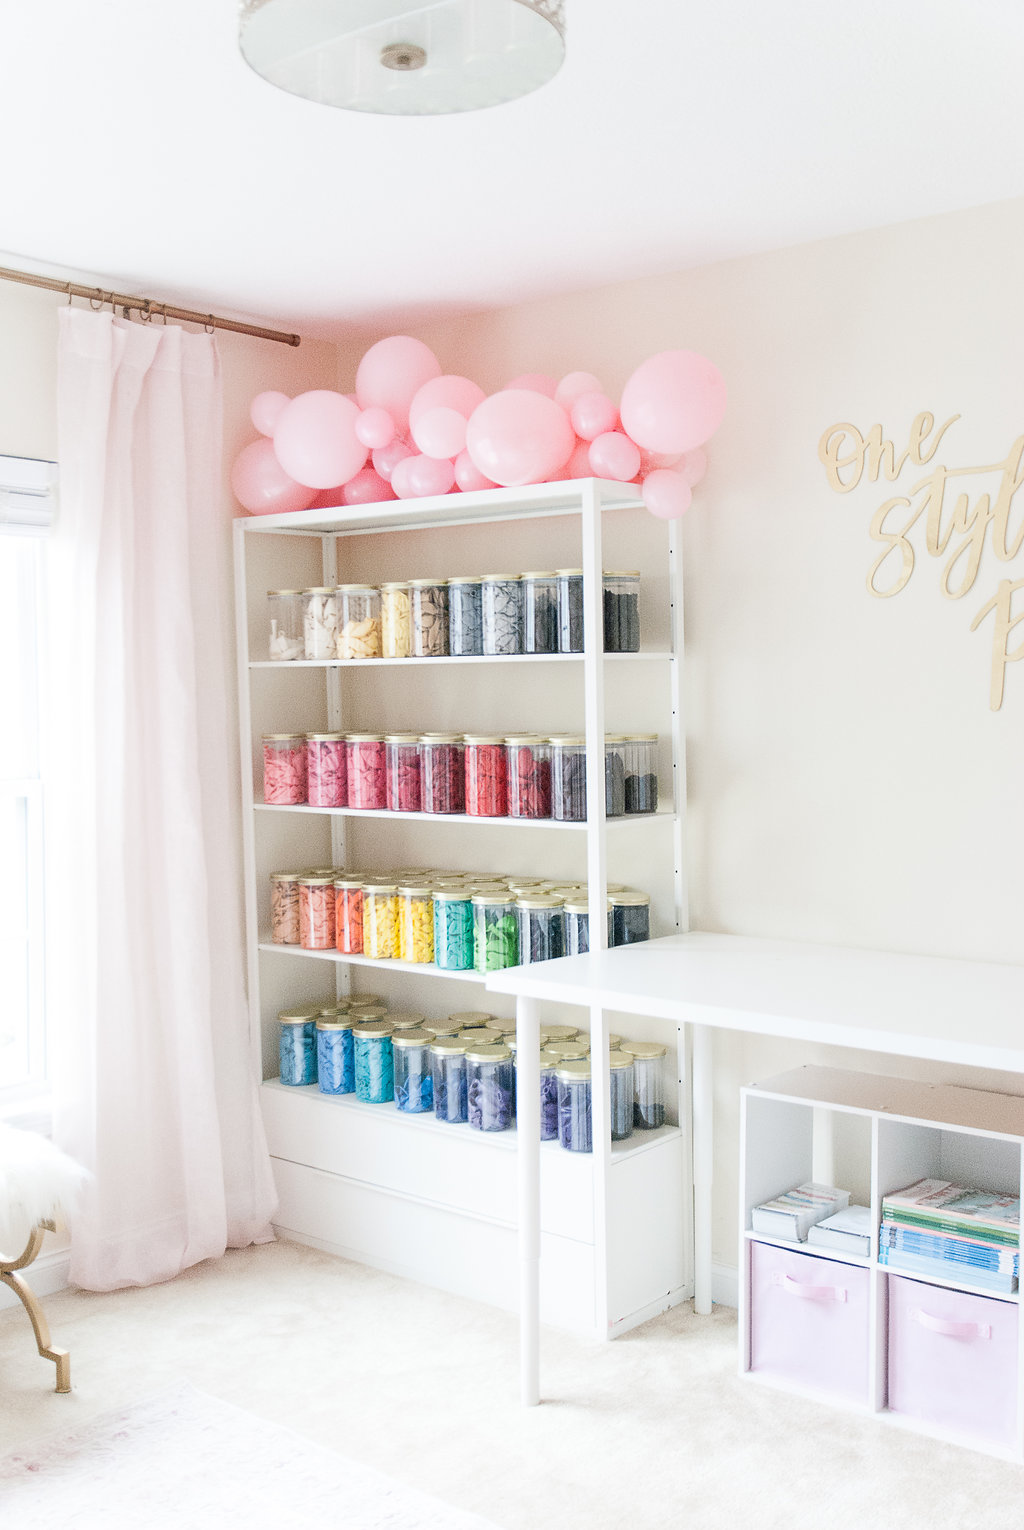
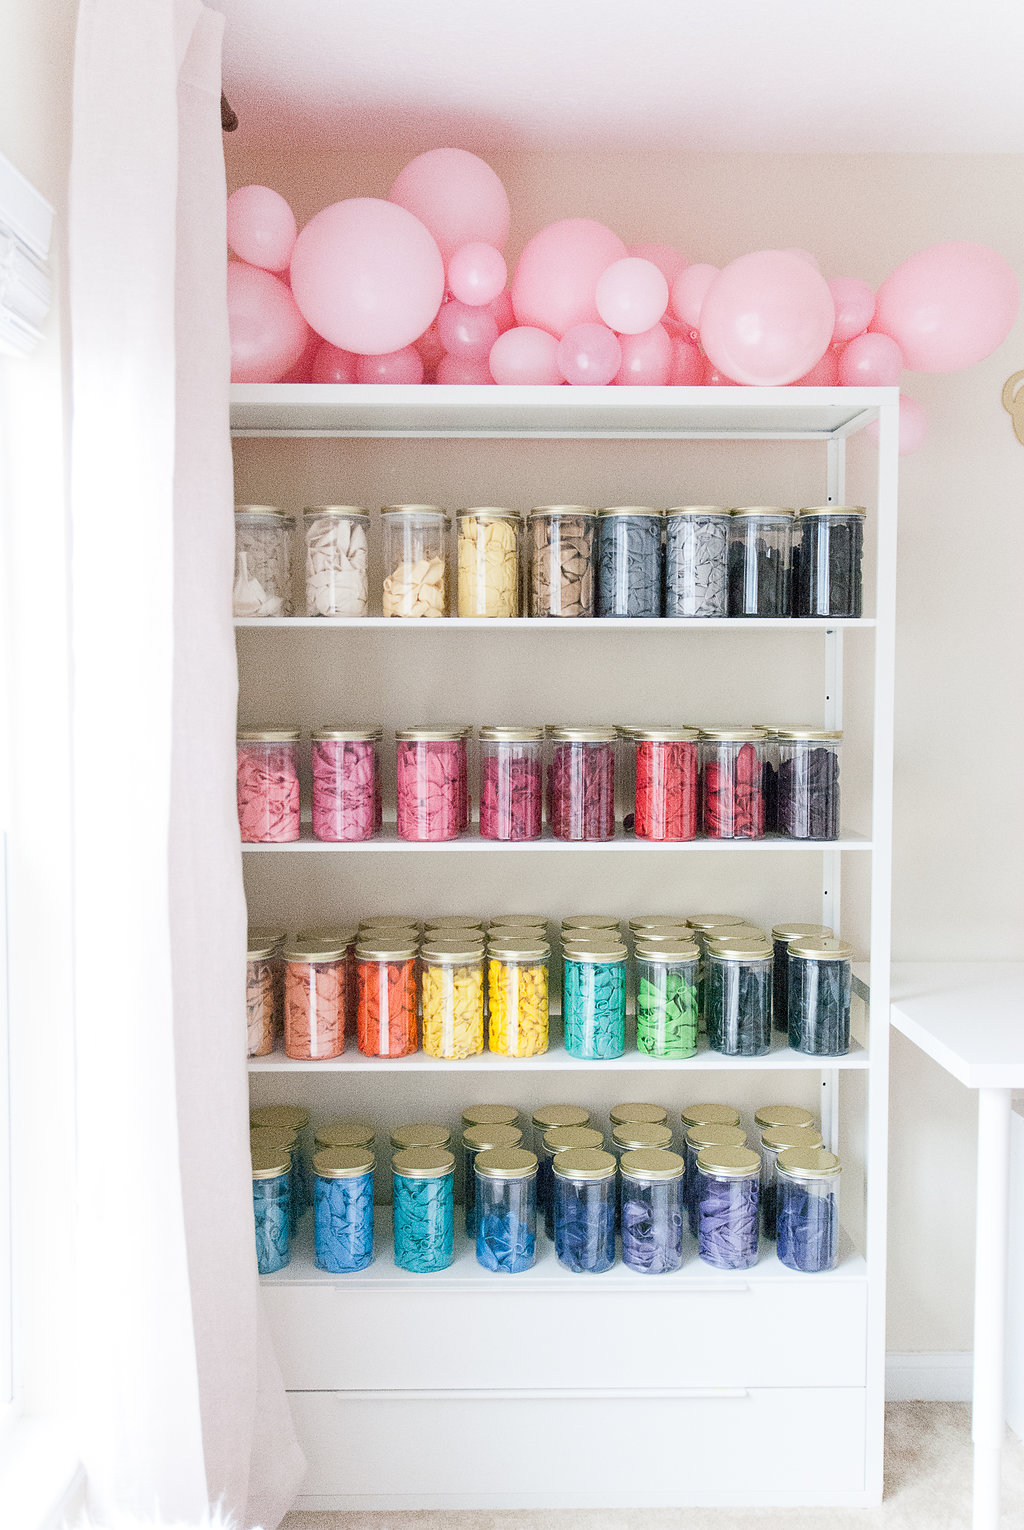
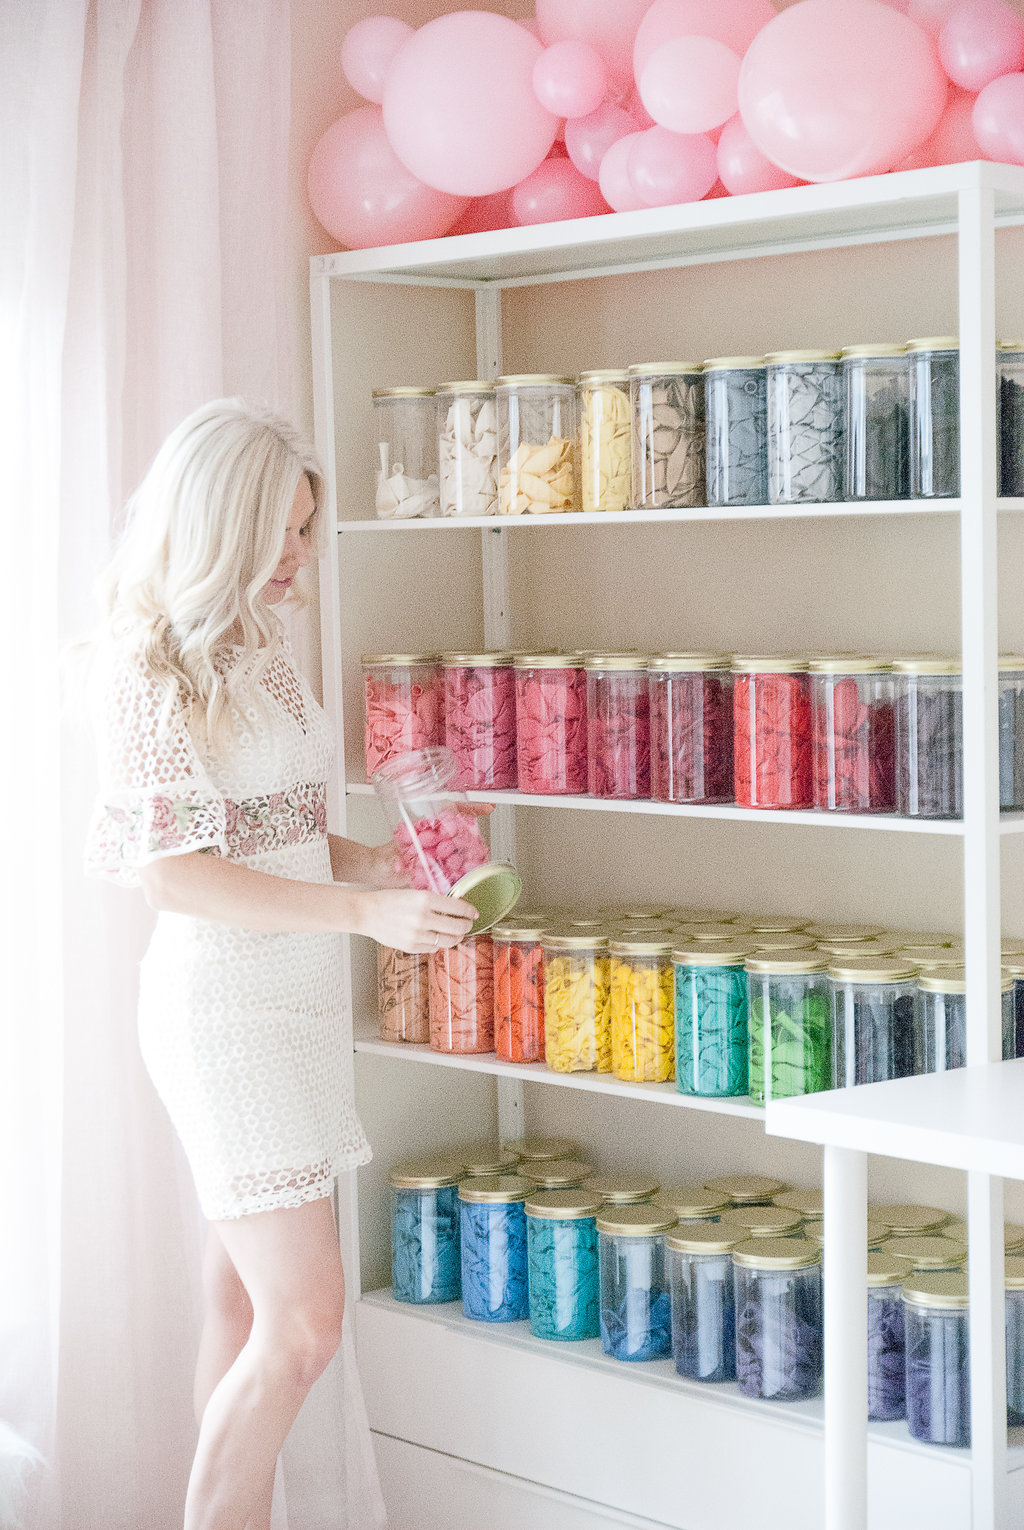
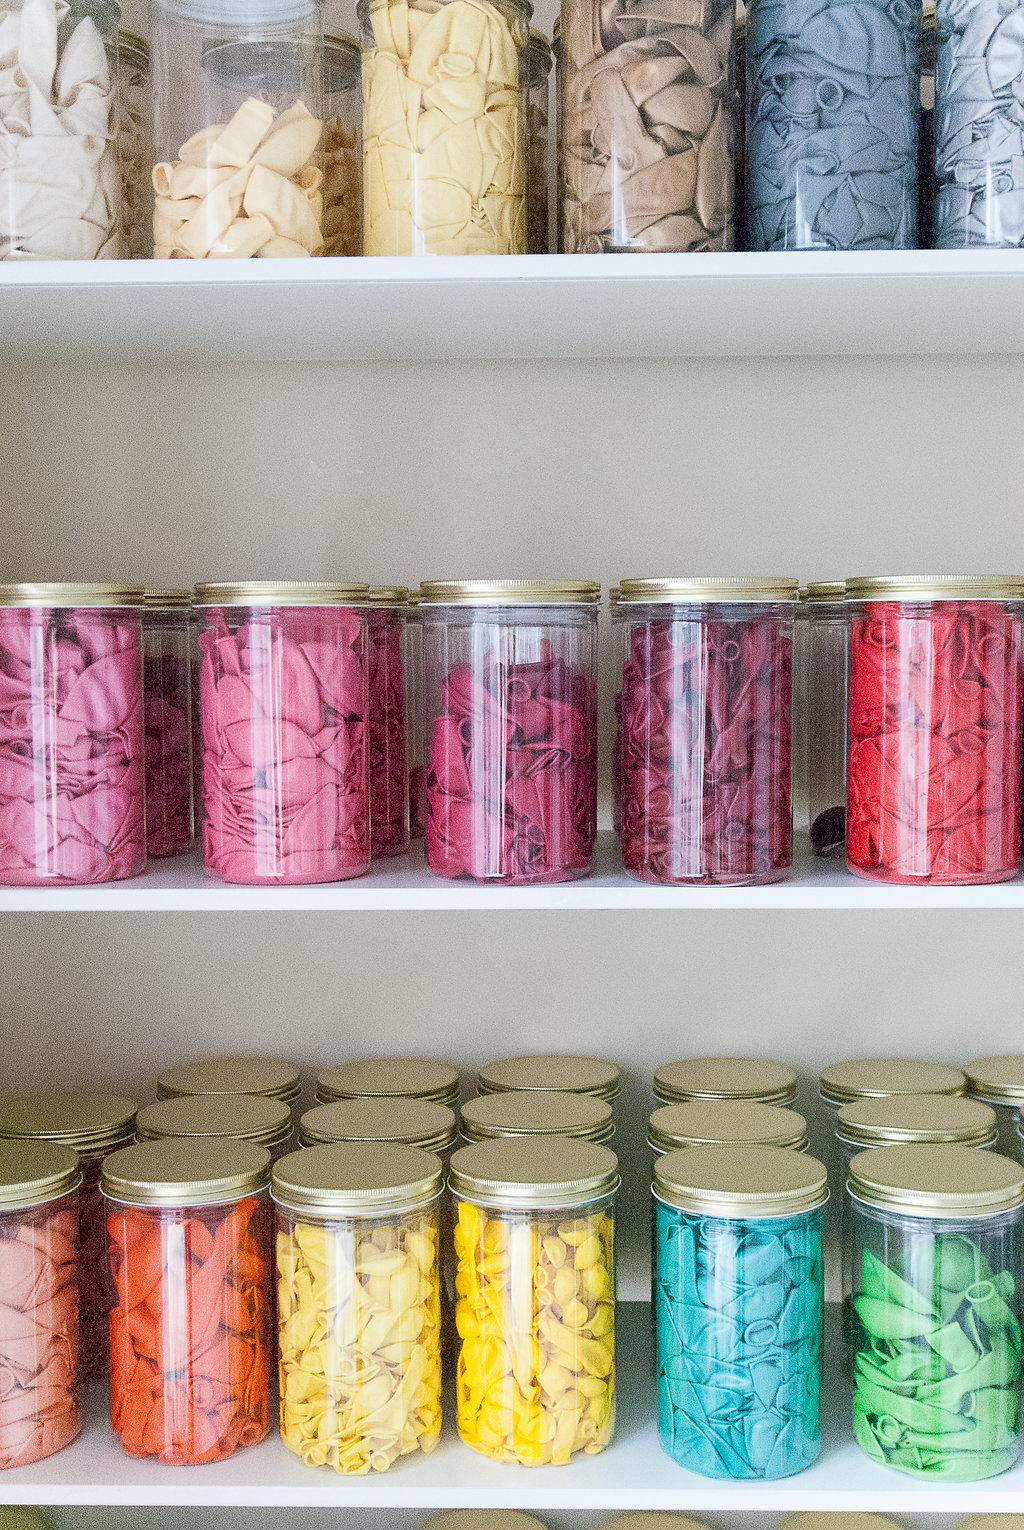
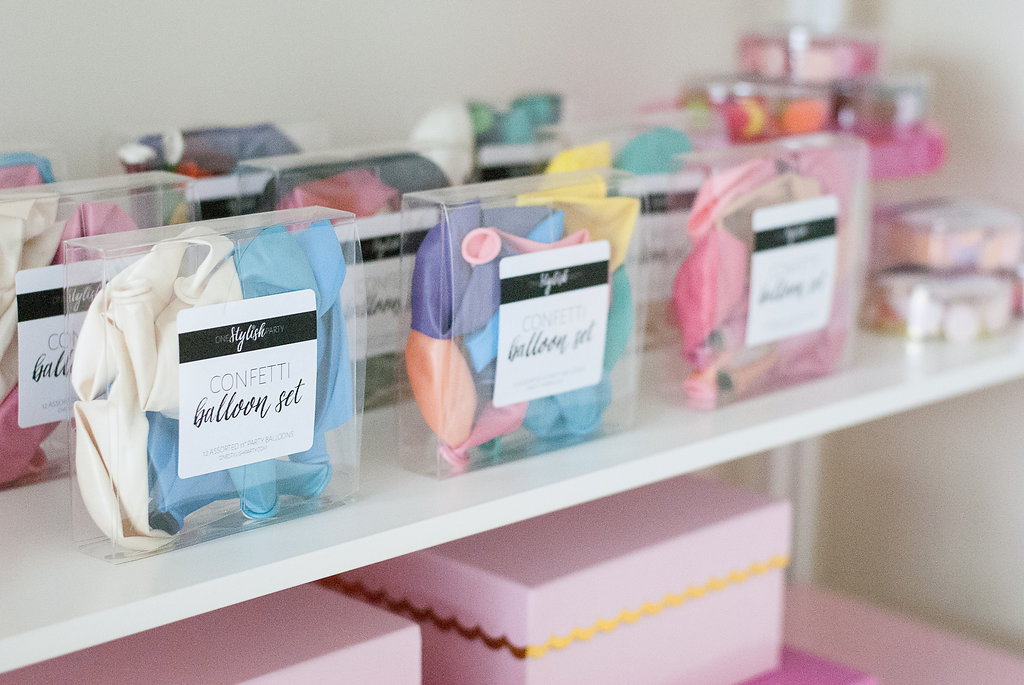
I can’t write this post without gushing about the balloon wall. Oh my goodness, I never knew organization could evoke such feelings of happiness! As my inventory of balloons has continued to grow since the launch of the DIY Balloon Garland Kit, I needed a way to easily access each balloon color to streamline the product assembly process. The balloon wall has also helped with inventory management since I can now just skim the shelves to know which balloon colors need to be re-stocked and ordered.
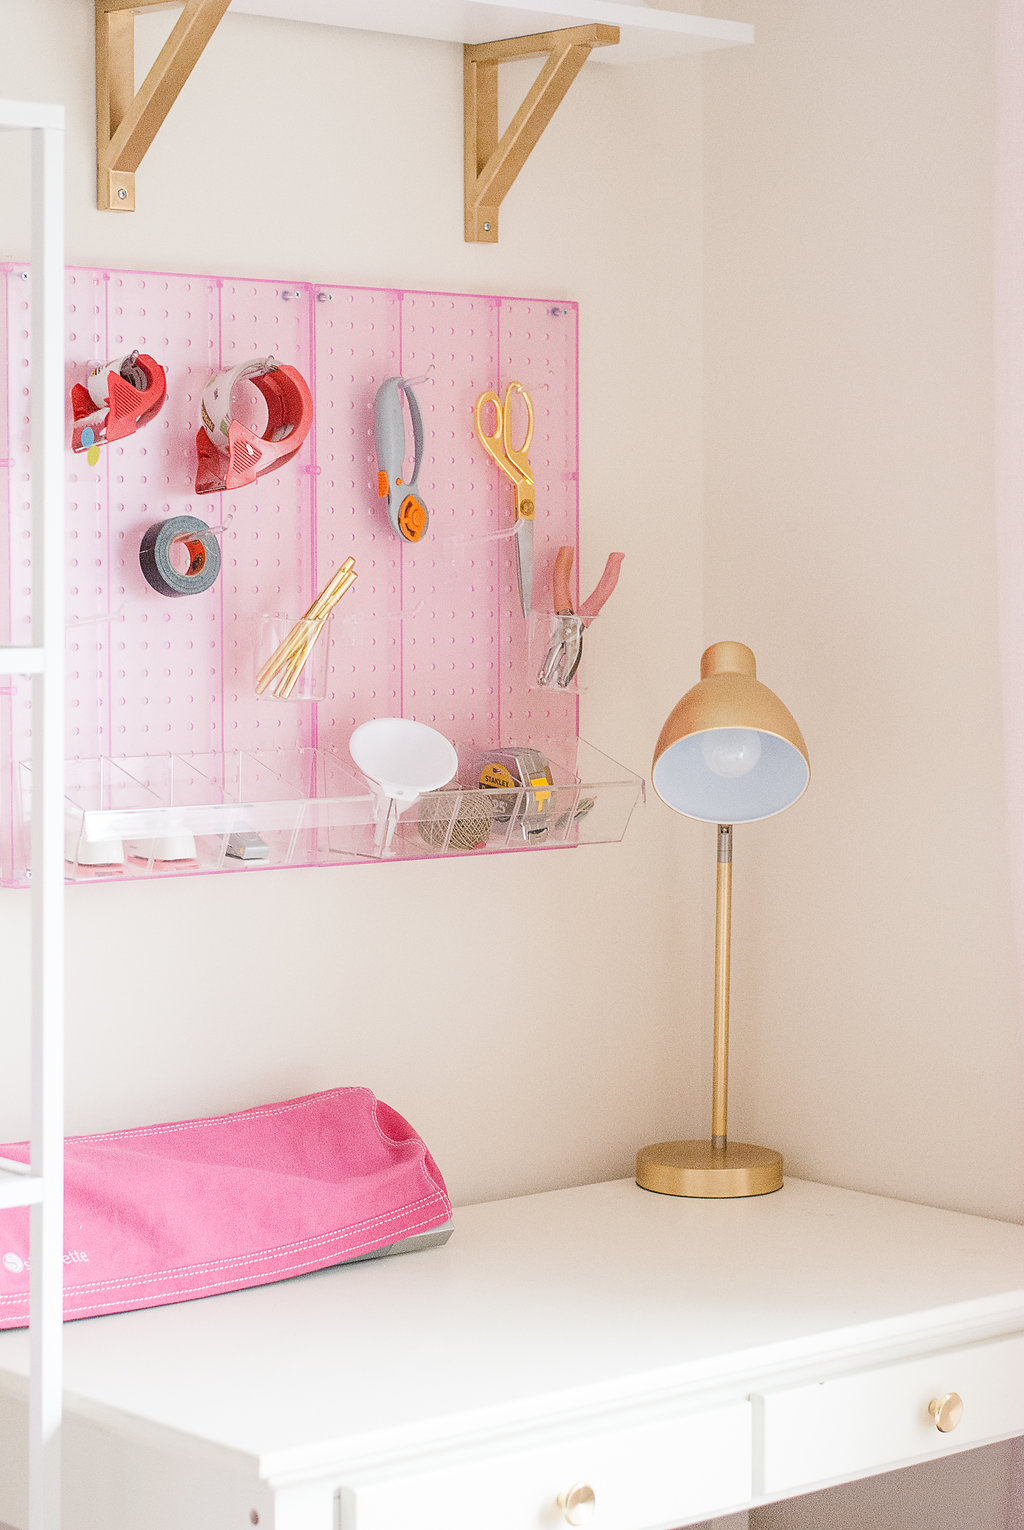

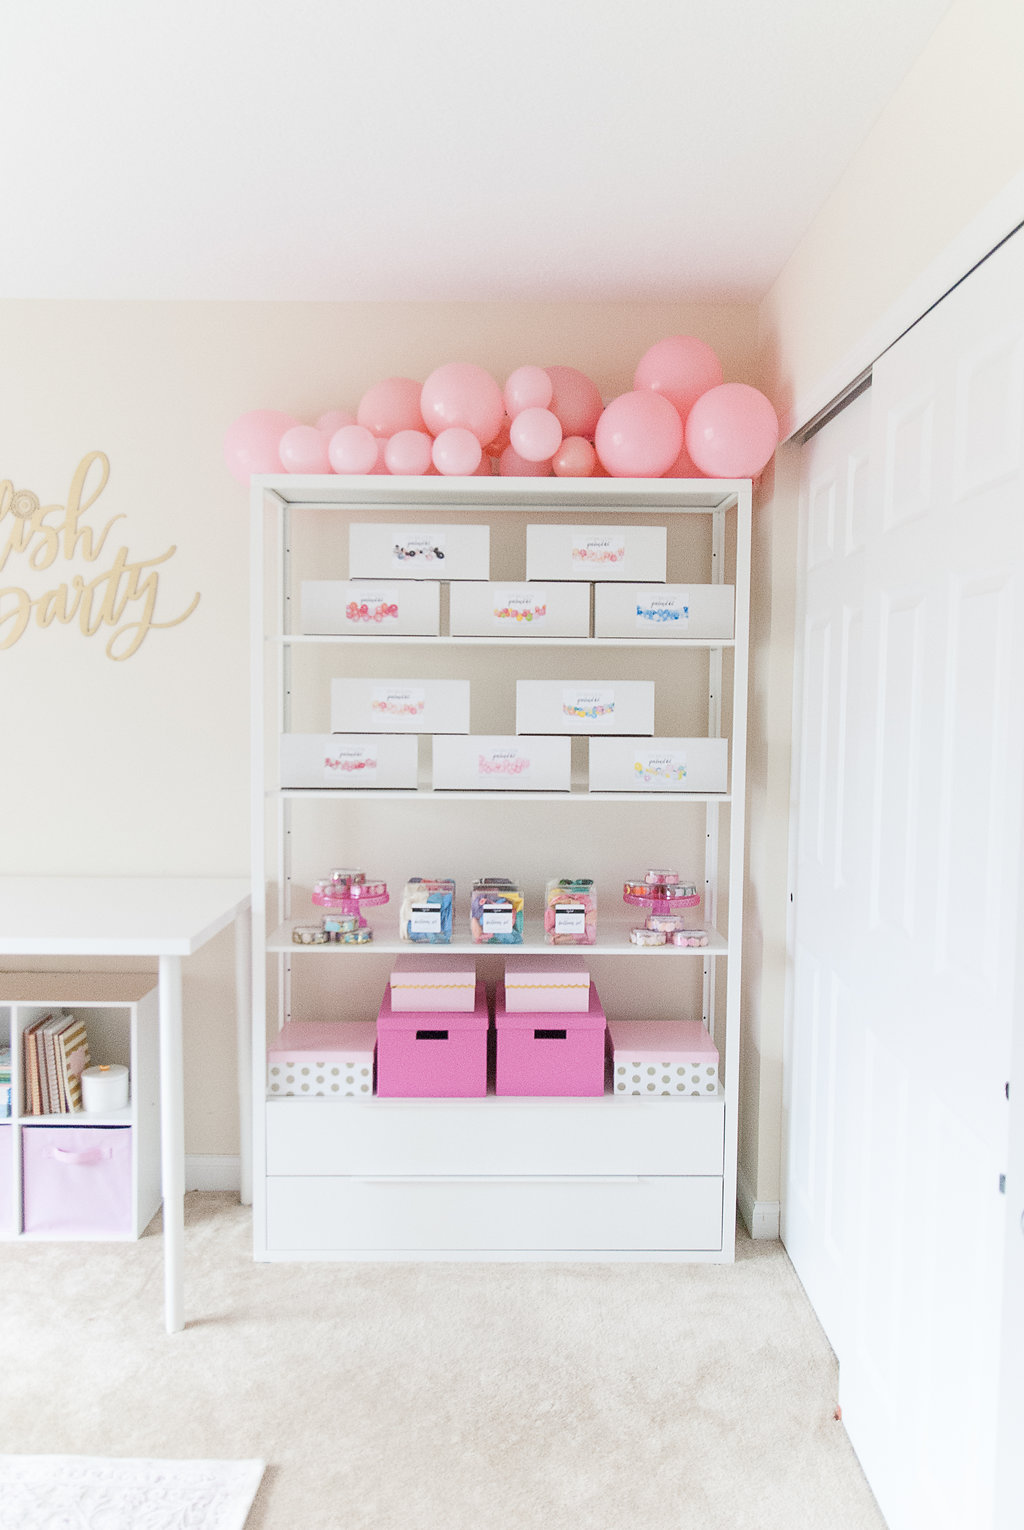
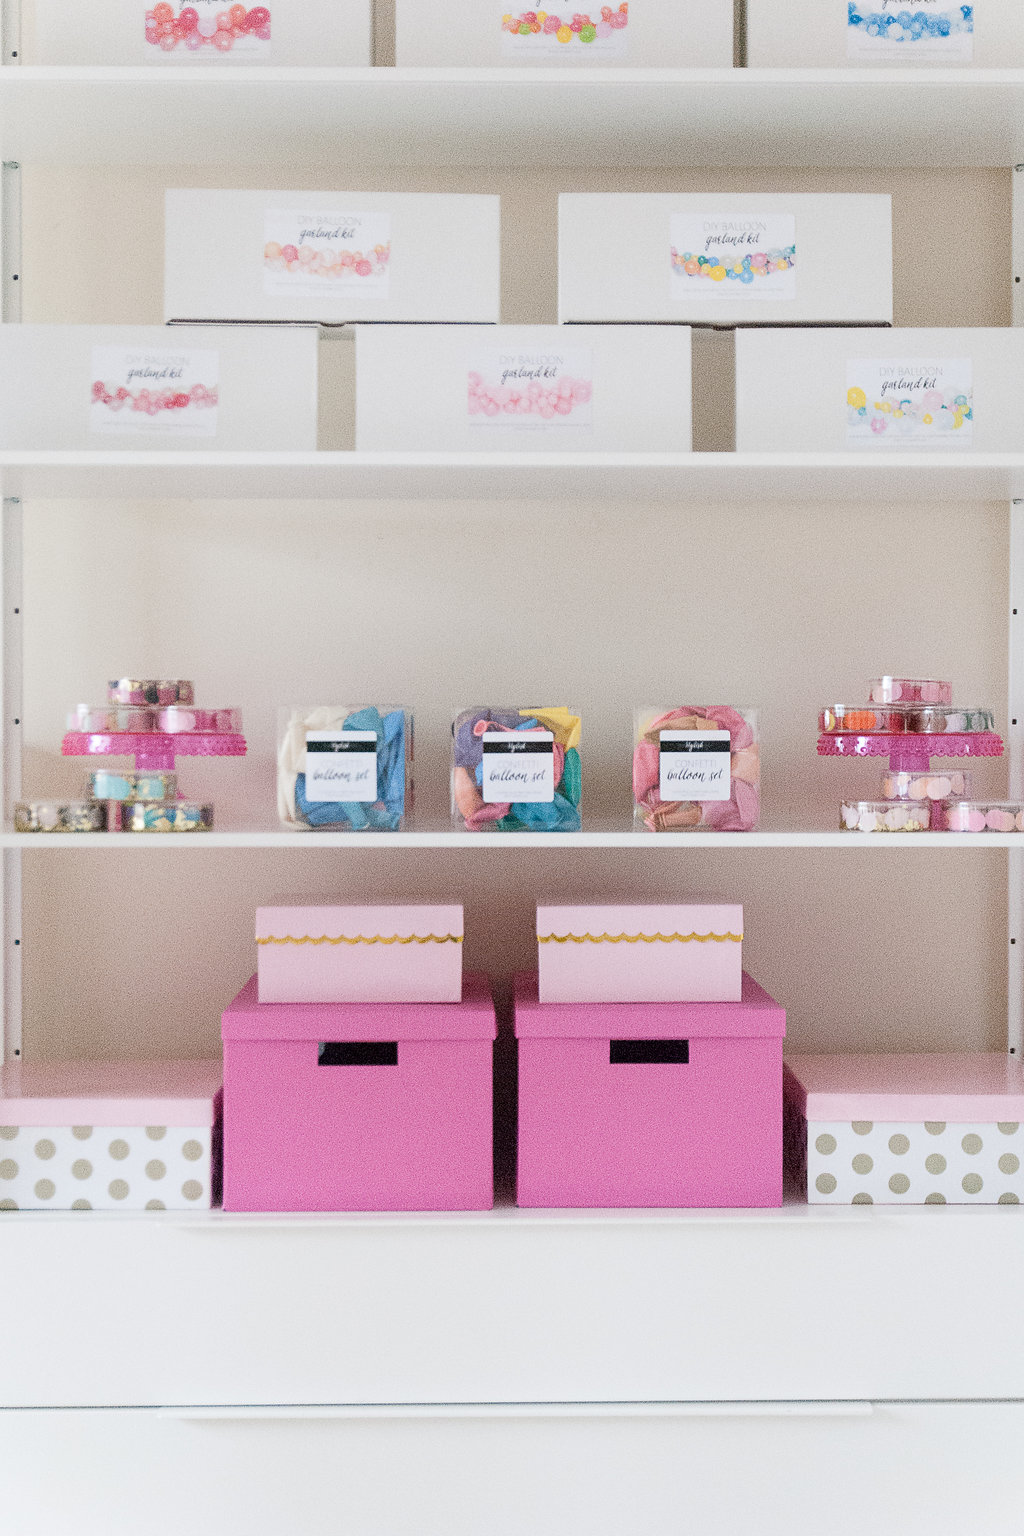
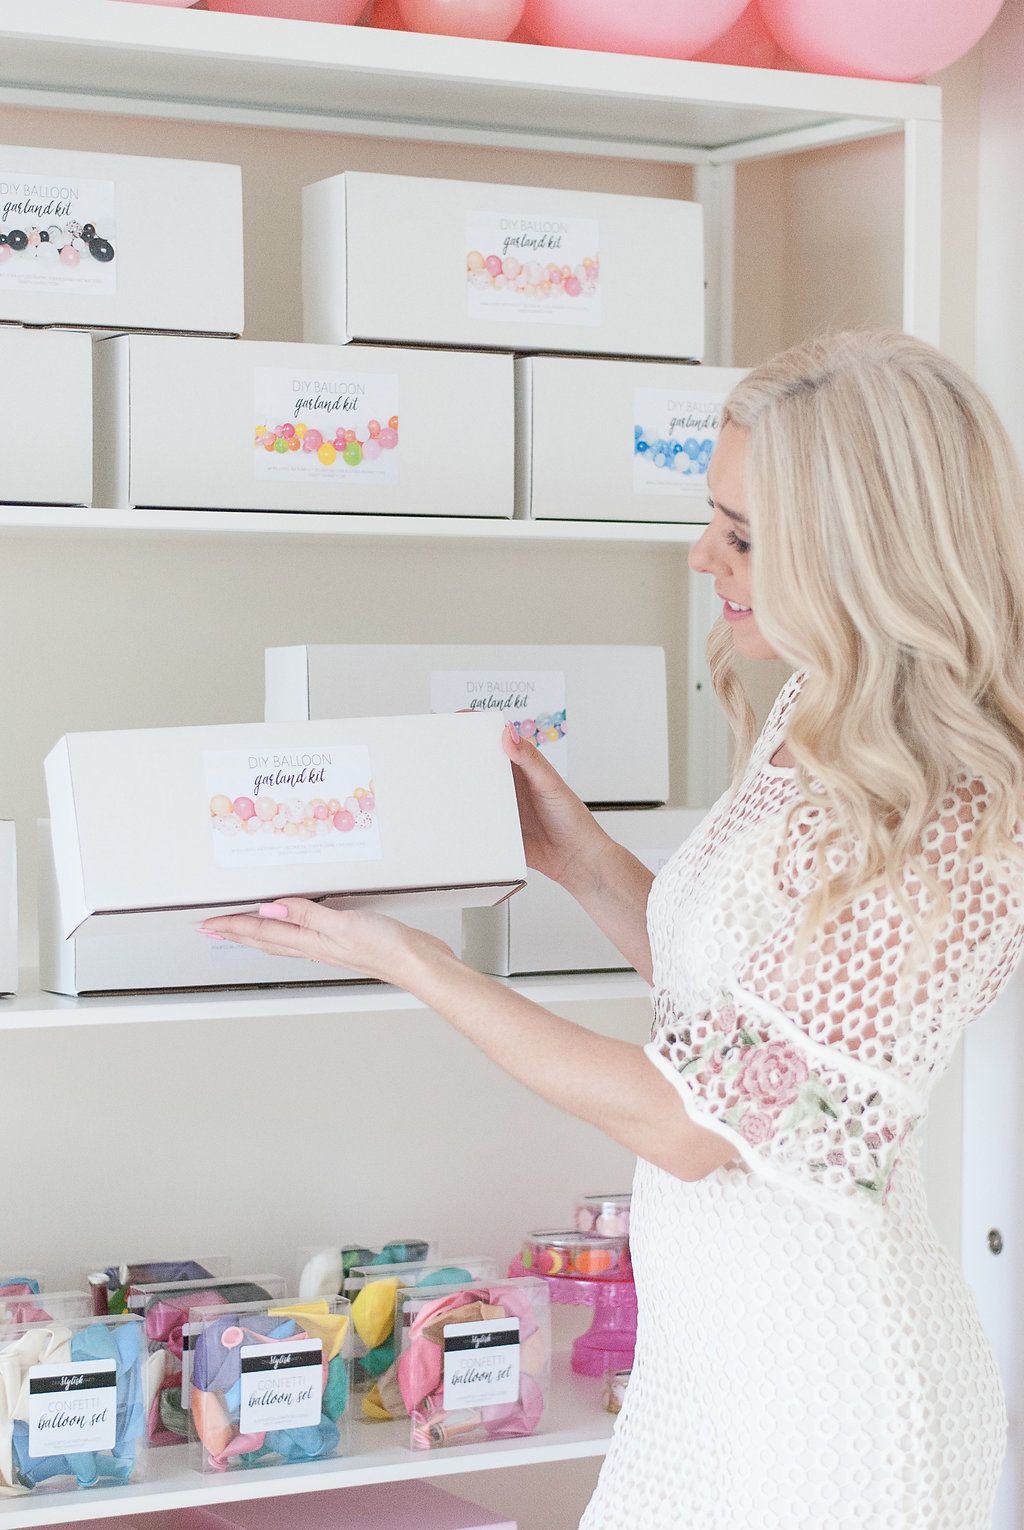
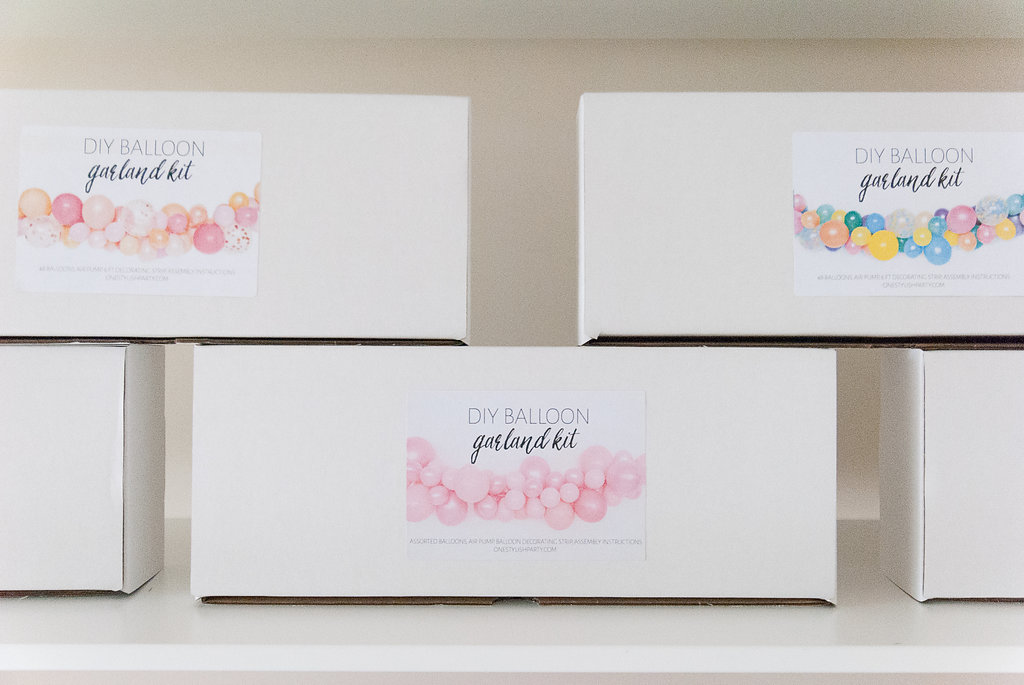
The other areas of work studio include a small shipping station that helps me keep my tools, boxes, tape and other shipping materials organized and readily accessible. And also a full shelving unit dedicated to storing ready-to-ship products. I like to think of it as my little retail display, despite the fact that my studio is not open to the public.
I couldn’t be happier with the way my studio came together. The space exudes the essence of my brand and inspires me each and every day when I step inside to start tackling my to-do list. Whether it is an entire room, or just a niche with a desk with a few accessories, I hope this post inspires you to designate a space within your home that inspires and motivates you to be creative too!
See below for links to the products I used to furnish and decorate my studio.
Computer Desk: White desk | Ghost chair | Spray painted square gallery wall frames (sold out, similar here) | Gold letter tray
Shipping Station: Thrifted desk | Silhouette Cameo | Gold desk lamp | Pink pegboard for office and shipping supplies | Plastic storage drawer
Balloon and Product Display Shelves : White Ikea shelving unit with drawers | Clear storage containers with gold lids | Pink balloon garlands
Work Table: White ikea table with adjustable height legs | Custom laser cut logo | Cube organizer shelf | Pink canvas storage bin
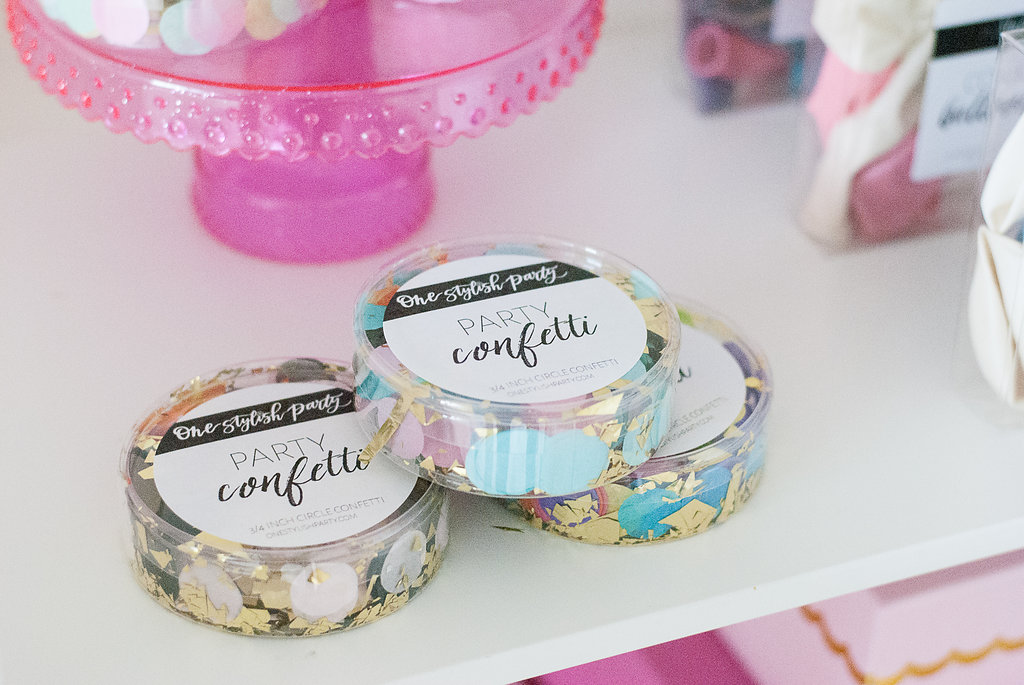
Pretty Little Details: Shelves to display party props | Semi-flush chandelier | Fur bench | Pink area rug | Gold drapery rod | Gold curtain hooks | Sheer pink window panels | Pink letterboard | Glass apothecary jars | Lauren Conrad Celebrate | Grace Not Perfection | Entertain in Style
Photography by Sweet Magnolia Photo & Design.

Such a beautiful space, well done! So happy you have a pretty ultrafeminine space for yourself! I’m sure you need it. I’m dying over your pegboard! The one you linked doesn’t look the same. Isn’t yours an acrylic or plastic?
Thank you! I love the way my studio came together. It looks like the pink version of my pegboard is unavailable, but the same maker has the individual pink pegboard panels available here: https://www.amazon.com/gp/aw/d/B008M7RX5I/ref=mp_s_a_1_2?ie=UTF8&qid=1519665764&sr=8-2&pi=AC_SX236_SY340_QL65&keywords=pink+pegboard&dpPl=1&dpID=31C6aFiaWkL&ref=plSrch. Hope that helps!
i love your space. where did you get the gold lids?
Tara-you did such a great job on your office…I love every detail! I will borrow many of your ideas as I design my own office space. We are going to convert part of our garage for my office/studio/photo space so your design ideas will certainly be used when I design my area. Also, I’d love to collaborate with you on a few projects this year so I’ll be sure to be in touch. Again, love your perfectly pink and chic office!!! XOXO
Wow, your space is absolutely beautiful! I dream of having a space this beautiful! So much inspiration in one room, thanks for sharing!!
I’m so inspired! It’s well organized and vibrant. I’ve been only thinking of the how my space would be decorated and this gives life to a deep desire. Thank you for sharing. 😊
I love your space. Where did you get those jar with gold lids
What color did you use for the walls?